Difference between revisions of "Calendar"
(→Managing the Calendar) |
(→The Field Sheet) |
||
| Line 22: | Line 22: | ||
# Save the entry by clicking [[File:Confirm.JPG]]. | # Save the entry by clicking [[File:Confirm.JPG]]. | ||
| − | ==The Field Sheet== | + | ==Inspection Schedules: The Field Sheet== |
[[File:FieldSheet.jpg|300px]]<br> | [[File:FieldSheet.jpg|300px]]<br> | ||
If the event is an inspection, Termite Kiosk allows users to save/print a Field Work Sheet.<br> | If the event is an inspection, Termite Kiosk allows users to save/print a Field Work Sheet.<br> | ||
Revision as of 21:41, 4 May 2016

The calendar is a good way to create and manage your schedules, whether it be for inspections, treatments, or generic appointments.
The schedule for the current day will always be located in a box on the right of the homepage.

Monthly, weekly, daily calendar templates are available according to users’ various needs.
Users may skip forward and backward a day, a week, and a month by clicking the arrow icons located on the top left.

Contents
How to Add a New Job
- Select Calendar from the navigation menu - the Calendar window will pop up.
- Click on
 located at the top left corner.
 - Choose the time of the job by clicking and dragging the blue squares, or manually inputting the time using your keyboard.
- Alternatively, if the job is happening at the moment, you can select NOW on the bottom left corner.
- Click on the empty box right next to the time. Select the date of your job from the mini calendar that appears.
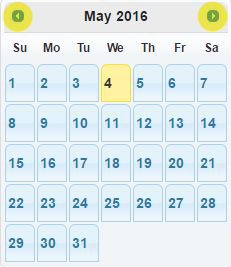
- You can change the month by clicking on the highlighted arrow keys.
- Change the duration of the job. You can change hours/days by clicking on the drop down arrow.
- User can select the type of job by clicking the options located on the right:

- The following input boxes will change accordingly.
- Save the entry by clicking
 .
.


Inspection Schedules: The Field Sheet

If the event is an inspection, Termite Kiosk allows users to save/print a Field Work Sheet.
This option allows for the inspector to have a hard copy of the form to fill out on the job,
so when it is finished, the user can easily transfer the information into a termite report on the computer.
When selected, a PDF of the Field Work Sheet will show up in a new tab. Save or print the file
by clicking the icons located on the top right (Google Chrome browsers).
Treatment Schedules


- Click on the

- Select an inspection report that needs treatment.
- Save the entry by clicking .
Managing the Calendar

The different categories of schedules are color coded:
- Inspection: DARK BLUE
- Treatment: BLUE
- Generic: SKY BLUE
- Completed Jobs: BLACK
Export Routes
TermiteKiosk, using Gooogle Maps, helps users to find the fastest routes to their destinations according to the calendar schedule.

- Click "Include my company address as first entry" on the top left
- Select the destination.
- Click "Export to Google Maps."
Then Google Maps will open a new tab on your browser and suggest the best route to your destination.

Clear the Calendar

In order to clear out the jobs that have been done, user may select the schedule box in the calendar and click “Clear Event.”
Before the user clear the Inspection schedule, he or she may choose the options next to the “Clear Event” button.
The dropdown menu allows user to choose to just 1) Return to calendar, 2) Create a termite report after inspection in the
"Termite Report section or 3) open the termite report directly.
For the Treatment schedule, it will only allow to 1) Return to calendar or 2) Open the termite report.
For the generic schedule, obviously, these options do not require.


Since the user inspected the property, the termite report can be created directly within the calendar section.